Guitar Making process

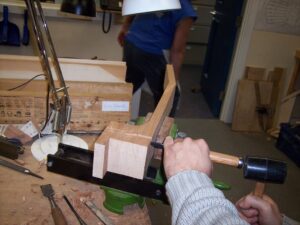
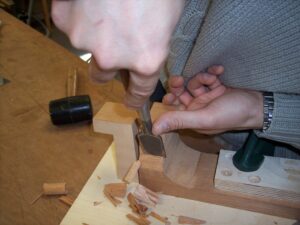
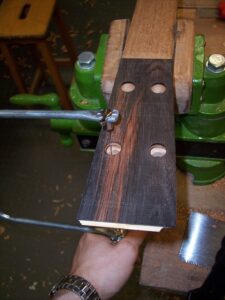
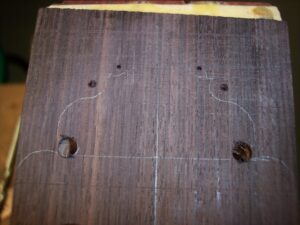
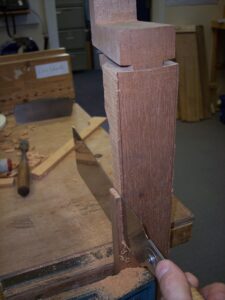
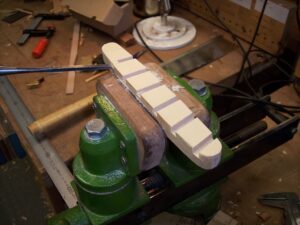
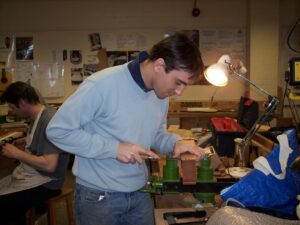
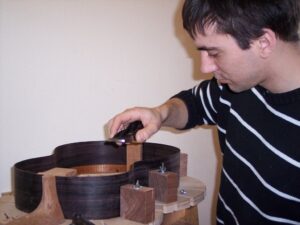
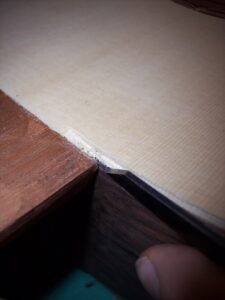
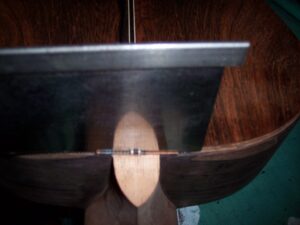
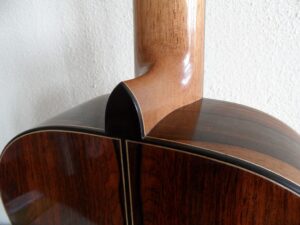
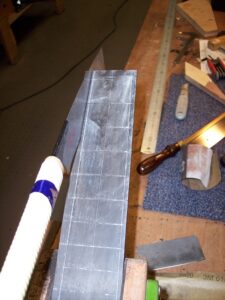
This is the heal block
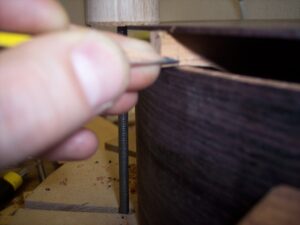
The heal block is the part of the neck of the guitar that will gather the sides with the top (harmonic plate) and the back of the instrument. Two cuts are made in each side at an angle. A wedge shaped entrance will be created so that the ribs (sides of the guitar) can be glued into the heal block with wooden wedges that will keep them in place. These wooden wedges are hidden in the inside of the guitar. Some guitars do not have these wedges because the sides are simply glued into narrow slots made with a saw.
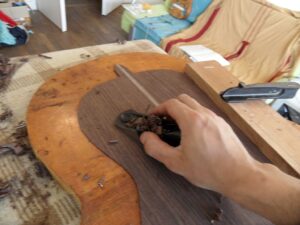
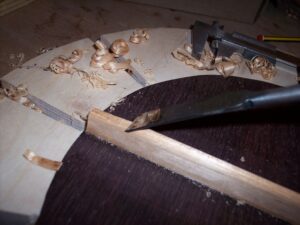
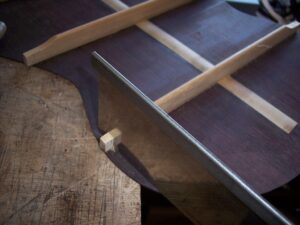
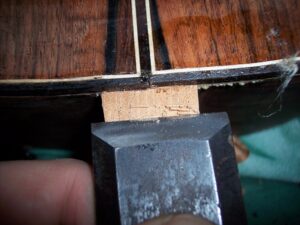
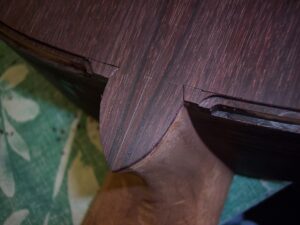
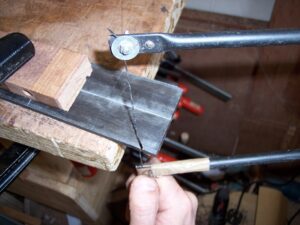
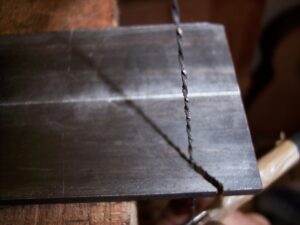
Creating the wedge shape entrances
With a chisel I take out the wood that are between the two saw cuts using a Japanese chisel and a mallet.
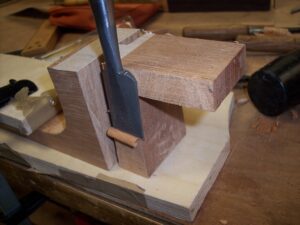
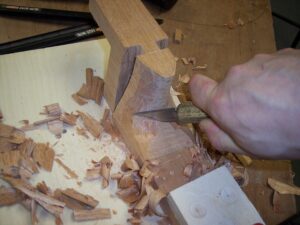
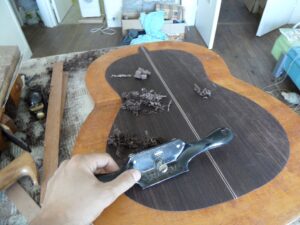
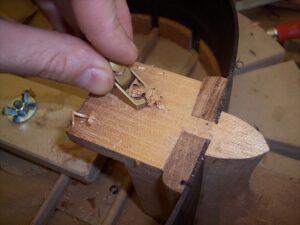
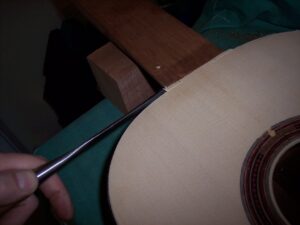
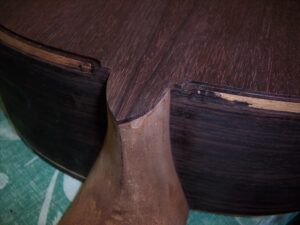
The foot
The foot is the part of the heel block that is inside the guitar. Here I use a Japanese chisel to carve it.
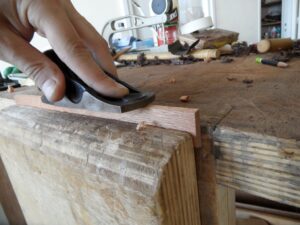
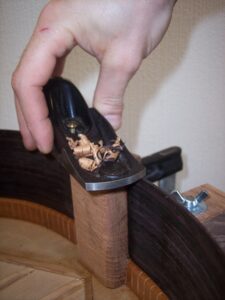
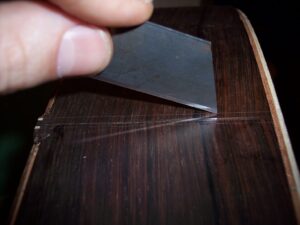
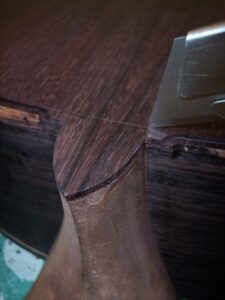
Carving the heal
The heal is carved down using a variety of different tools: Chisel, carving knife, rasp, and finally a cabinet scraper.
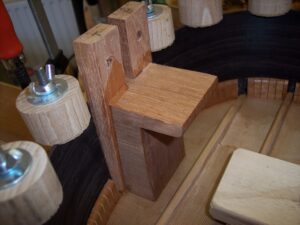
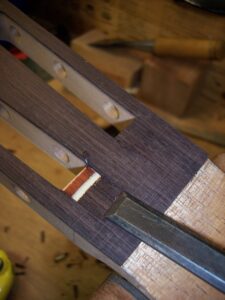
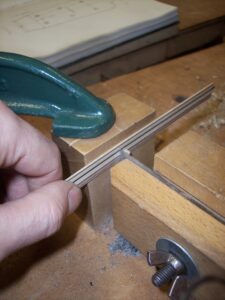
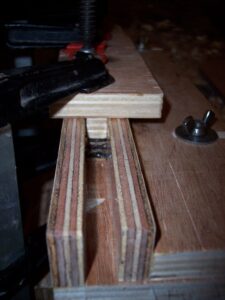
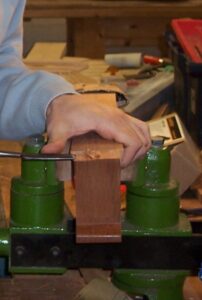
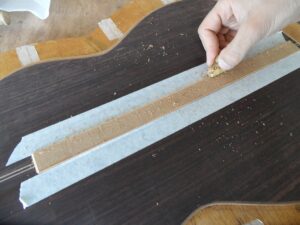
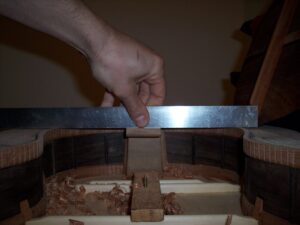
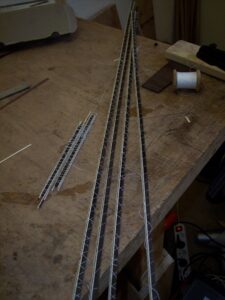
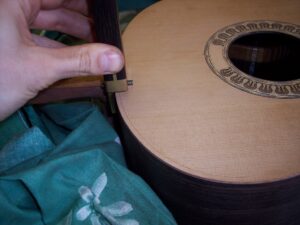
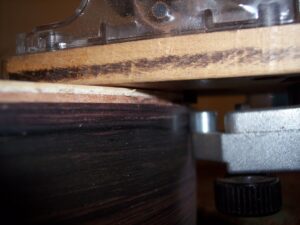
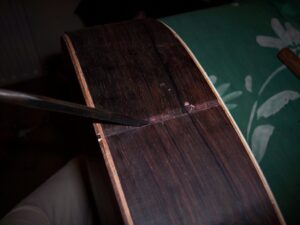
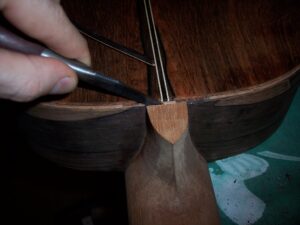
The wedges
This is what it looks like when the wedges are placed into the heal block.
In this photo the neck has already been glued to the top. The sides are then glued into the heal block and onto the harmonic top. The sides are clamped in place and the the two wooden wedges are also glued in place. The wedges must be cut precisely to the right length otherwise they will not go all the way down.  In this photo, the wedges are holding two pieces of rosewood as if they were the sides of a guitar.

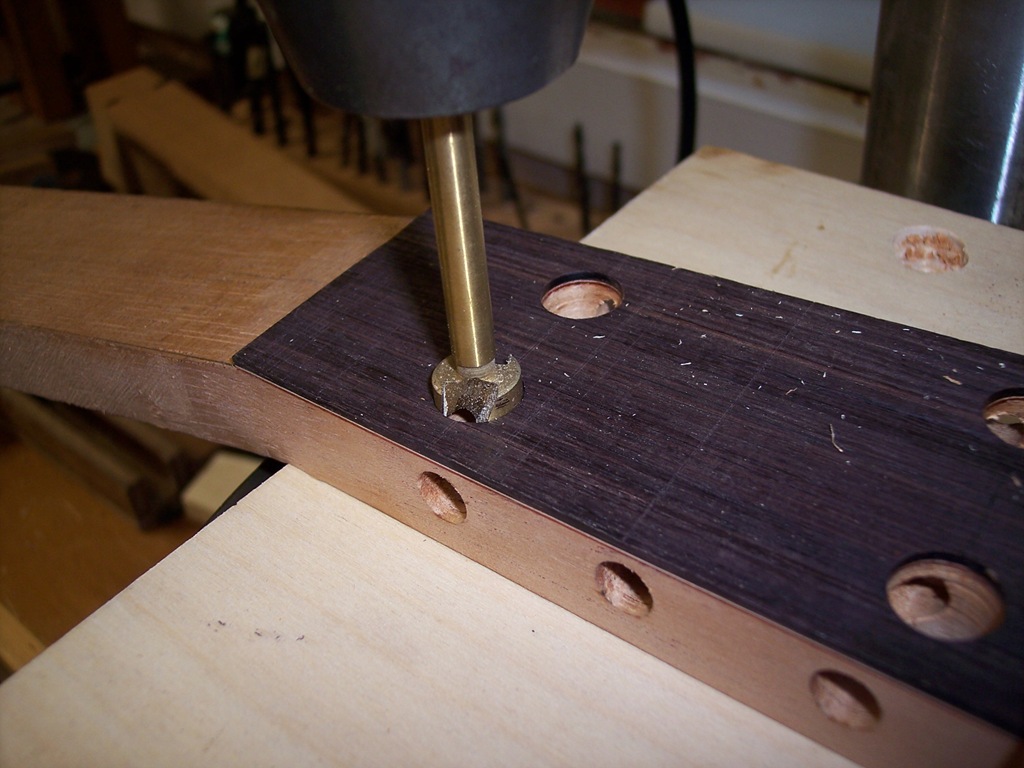
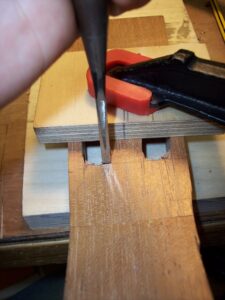
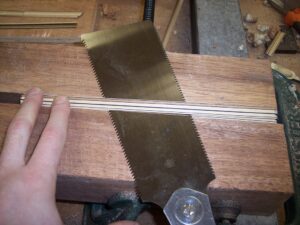
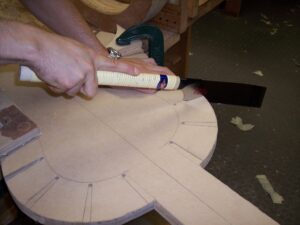
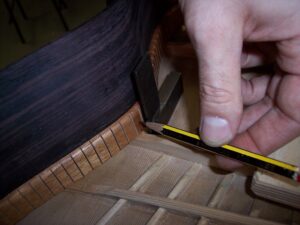
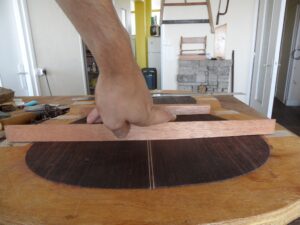
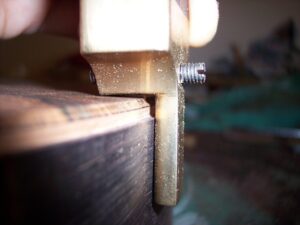
A very special saw
This Japanese saw is made specially for cutting dowels (or in this case wedges).
Here I cut of the extra length of the wedges.
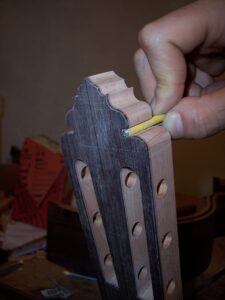
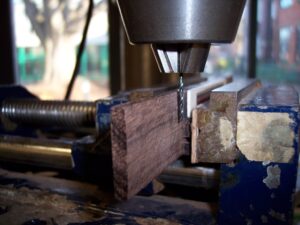
The Head
The head of the guitar is made by cutting a plank of cedar wood at an angle. The surfaces are planed perfectly flat and glued together to create the angle. afterwards the upper surface is planed flat and a rosewood veneer is glued onto the top surface. The sides of the head are cut and planed to the final shape.The placement of the tuning machine is traced (holes on the sides) and these are drilled using a drill press. After this a set of four holes are drilled through (as in this photo)
these four holes (two on each side are going to be the top and bottom of the head slots.

Carving the Head slots
Between these holes two cuts are made with a hack saw and then the sides are carved with a chisel.
Carving the ramps
the slots end with a ramp that lets the strings go through without having to touch the head. On this guitar there are some veneers under the rosewood veneer. When this ramped is carved, they appear as a white and brown decoration.
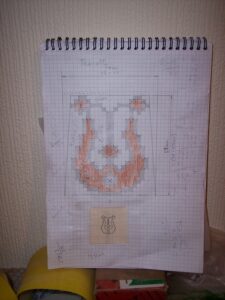
Head Design
The head design is traced onto the head and several holes are made with a drill. Then the head is carved with a chisel and sanded smooth.


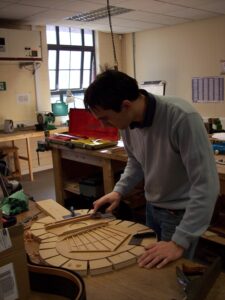
Cutting the sides of the neck
The neck is placed into a vice and the sides are cut into shape following the pencil lines.
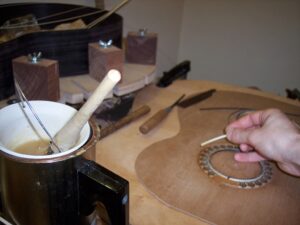
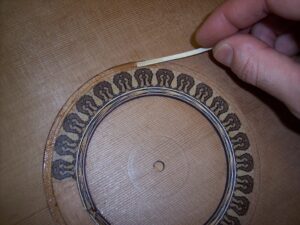
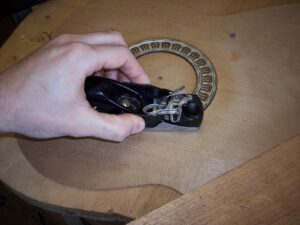
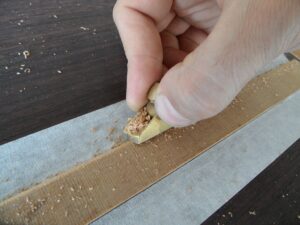
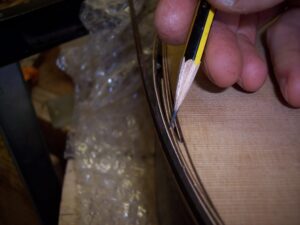
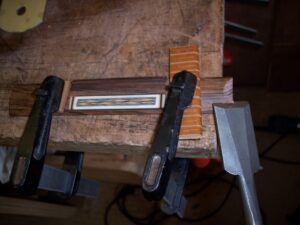
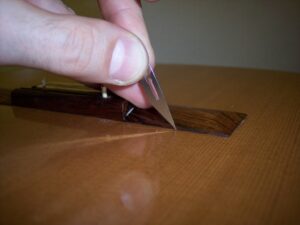
The Rosette
The rosette is many little squares of veneer. To obtain this design I have glued veneers together following 12 different patterns. Then I cut the veneers into strips and scape them until they are 0.5 mm thick (the same thickness as the veneers where in the first place.
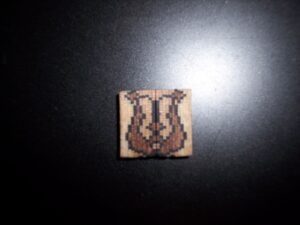
By gluing these strips together according to the design, I get a long log that represents half of the design. I cut this log into thin tiles and by putting them next to each other I get the symmetrical design.
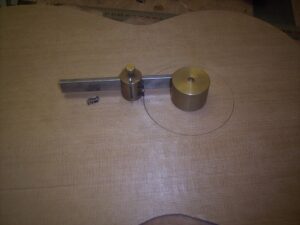
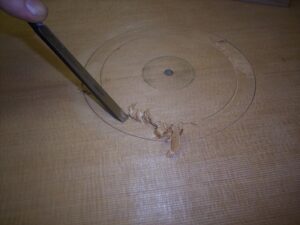
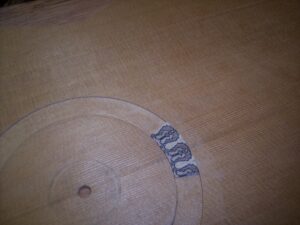

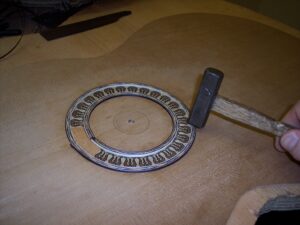
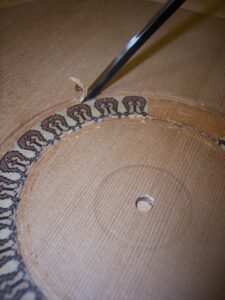
These tiles are glued into a carved circle made into the top. I use a circle cutter and a chisel to carve out the wood so that the tiles will fit into the top. After this I plane down the tiles so that they are level with the soundboard
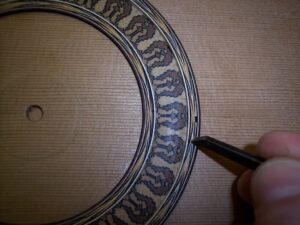
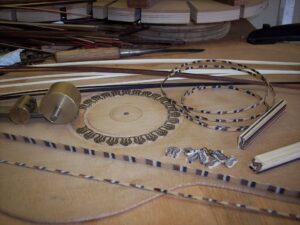
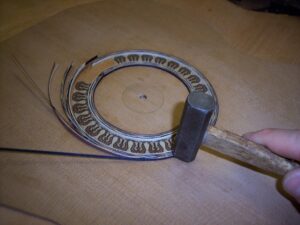
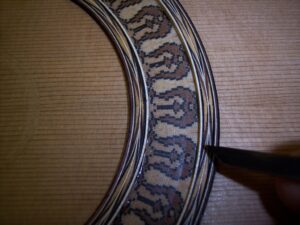
This rosette has a herringbone inlayed in the centre.
I also create a herringbone pattern by gluing different colour veneers at an angle into a special jig. Then I plane it flat, cut strips from it and finally scrape these strips. When put together they form a set of symmetrical arrows. I then glue them into the top in the same way as I did with the tiles making these arrows point to the centre of the soundboard. There are also simple veneer strips of different colours (black, white) that separate the central motif from the herringbone and the herringbone from the rest of the soundboard. I use a hammer to make sure that the veneers are glued al the way down. A block plane is used to level the surface of the rosette with the rest of the soundboard.
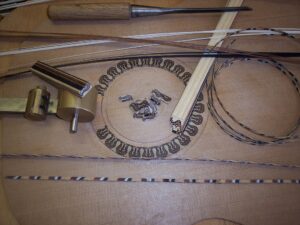
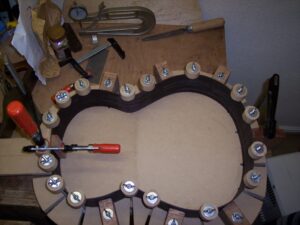
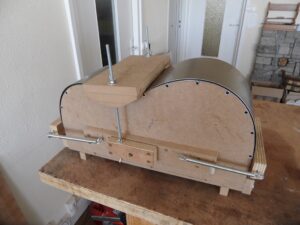
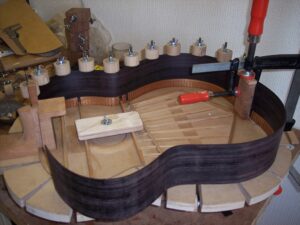
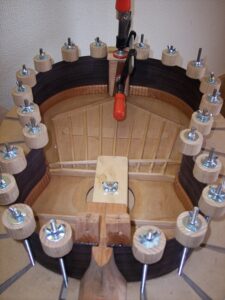
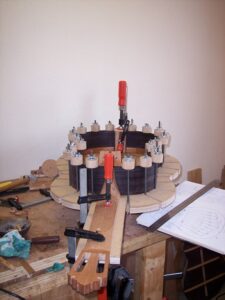
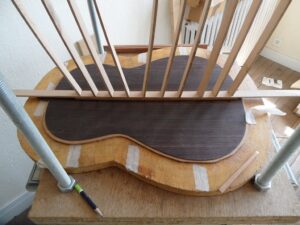
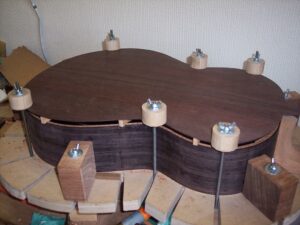
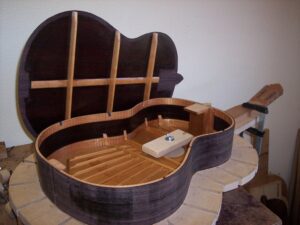
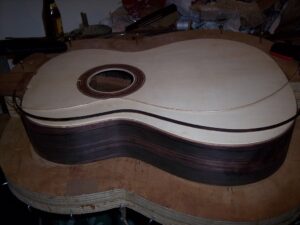
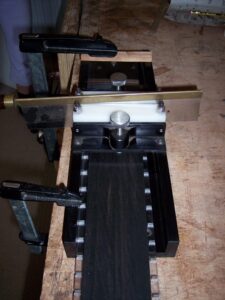
The Guitar is made above the “Solera”
In this photo I am using a “Solera”
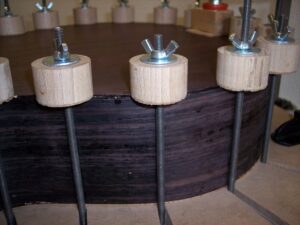
The solera is a board that is used as a mold. The soundboard is clamped to it by a wooden caul that is screwed to it (the screw goes through the sound hole) photo n°3 . It has a centre line and the shape of the guitar. and all around this shape it has entrances for assembly clamps. The Assembly Clamps (photo n°2) are made of wooden cylinders that have a centre hole and some felt or cork glued to the inside surface. A screw rod goes through and it has butterfly screws at each end. See photo 2 The clamps are being used to glue the back of the guitar.

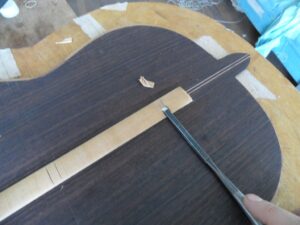
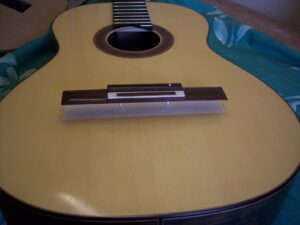
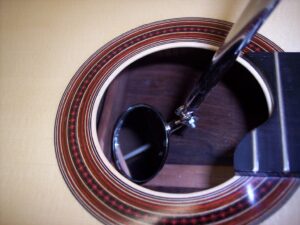
Another important caul is this bridge caul. It will later be used to clamp the bridge to the soundboard. Since the bridge is glued onto the soundboard at the very end of the guitar making process, it is important to have made this caul before the “box” of the guitar is closed. This caul must fit perfectly over the soundboard struts inside the guitar and it would be very difficult to make any modifications to it once the guitar box is closed. This caul will enter the guitar through the sound hole.
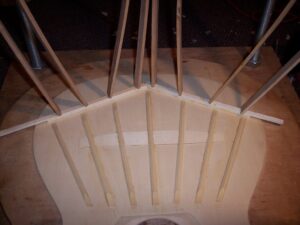
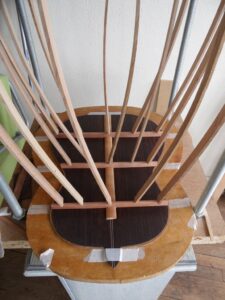
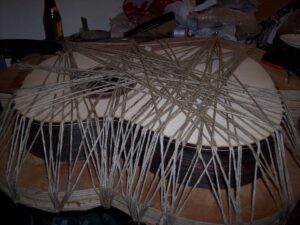
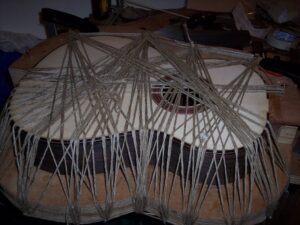
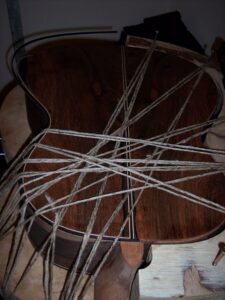
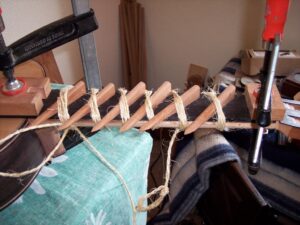
The go Bar deck
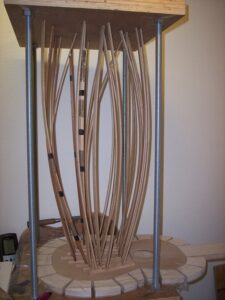
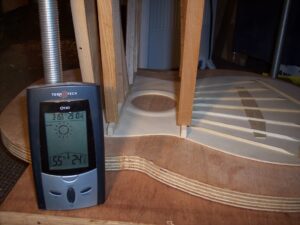
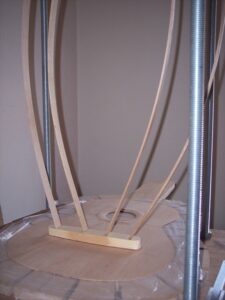
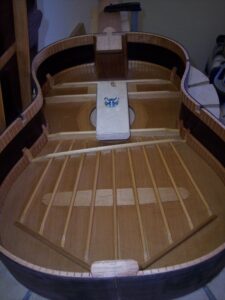
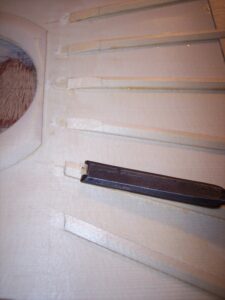
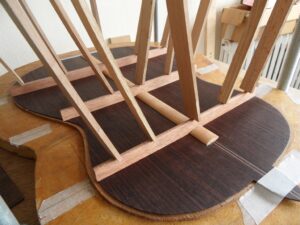
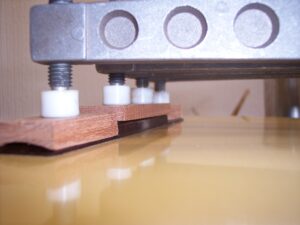
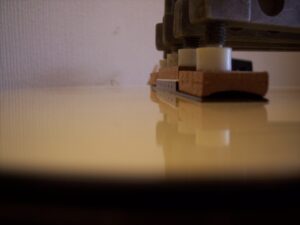
The go bar deck is made of two platforms that are fixed together by four bars in each corner. It is used with flexible strips of wood that by being bent will press the various fan struts, soundboard bars and also the back bars when they are glued in place. When using the go bar deck it is very important to check the humidity rate. The humidity rate should remain constant through the entire process of the making of the guitar. And specially when gluing such things as bars or fan struts. The fan struts are glued onto the soundboard and they support a lot of tension from the strings, their mayor role is to hold the soundboard in shape while the strings are pulling the bridge. The fan struts are glued onto the soundboard while it is on the solera. The solera also has a convex shape right under the bridge area so that the fan struts are glued to a domed soundboard. This dome will remain afterwards and it will enable the guitar maker to make a very light weight soundboard that has a very strong structure. Right underneath the bridge there is a strut that is large and very thin (under 2 mm) that will help the bridge transfer the sound in an equal manner to the entire soundboard.

The Soundboard
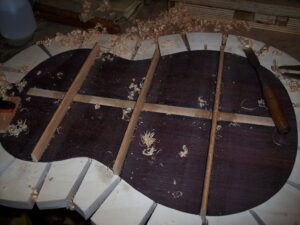
The soundboard is made of Spruce or Western red cedar. the wood is book-matched. The guitar maker joins two book matched planks and the outline of the soundboard is traced using the join as a centre line. After this the rosette is installed and the outline is cut with a hacksaw. The soundboard is planed to a thickness of 2.5 mm in the centre and 2mm around the edges. A bridge reinforcement is glued on to the soundboard using the bridge caul (see photo n°3 above)and then fan struts (with notches to let the bridge plate go through, see photo n°1 and 4) are then glued over. Many soundboards have also got two additional fan struts called “closing bars” (see photo above n°5).
The soundboard has also a reinforcement for the sound hole and struts that go across the width above and underneath the sound hole(photo n°2 and 7). These struts are also known as harmonic bars.
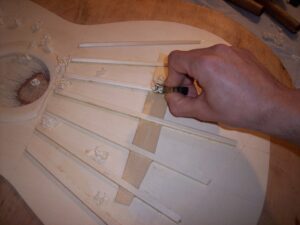
The luthier will carve these various struts until the soundboard has the right flexibility, not too stiff or too soft.
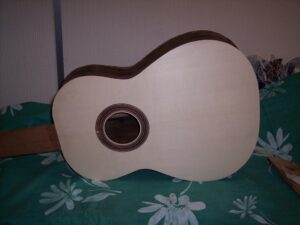
The neck is Glued to the Soundboard.
In order to glue the neck to the soundboard, the heal block must be carved on the top surface. The soundboard is placed and clamped to the solera following the centre line. The neck is glued to the soundboard and placed onto the solera also following the centre line, this way the neck and the soundboard will be perfectly centred.
The Ribs
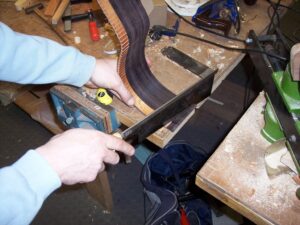
The ribs are the sides of the guitar, the are made of two symmetrical planks of rosewood that are planed, scraped and then bent to the shape of the guitar. To bend the sides I moisten the wood with a bit of water and I use an electric bending iron.

A special jig can also be used to bend the sides, the jig has light bulbs inside that heat the wood.
After this I glue a kerfed lining onto the edge of the ribs. The kerfed linings are made of cedrela (the same wood as the guitar neck) they are cut into long strips, a half-round edge is made on one side and many saw cuts are made at a regular distance to each other.
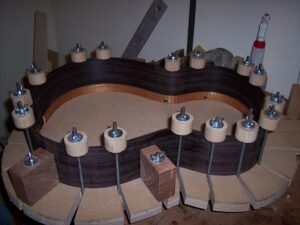
The ribs are cut to length and are set onto the solera. The surface of the ribs must be perfectly flat so that they can be glued to the soundboard.
The ribs are placed onto the soundboard and the kerfed linings are marked were the need to be cut so that the various struts or even the wedges (heel block) can be glued in place.

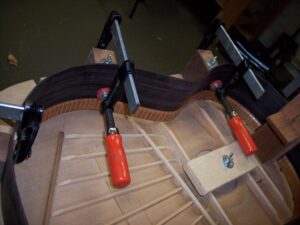
The Ribs are glued onto the soundboard and the heel block wedges are glued in place. A end block is also glued to the soundboard and to the ribs at the same time. The assembly clamps press the ribs against the soundboard.
The guitar neck is firmly pressed to the solera following the centre line.
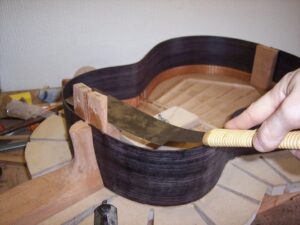
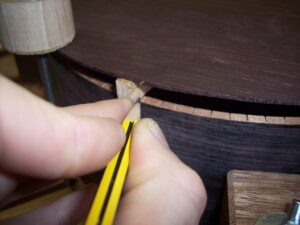
The wedges are cut level with the heel block.

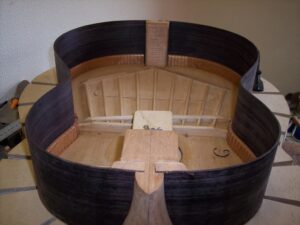
The ribs are then planed down to their final shape and other kerfed linings are glued in place on the edge of the ribs that will receive the back of the guitar.
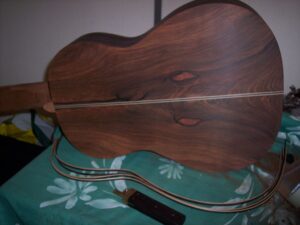
The Back.
The back is made of rosewood. The back and sides are sold as sets so that the rosewood has the same quality and colour. The back, just like the soundboard is made of two symmetrical (book-matched) pieces of wood. These two pieces are joined together and planed flat. Then it is cut to the outline of the guitar shape. After this the luthier planes and scrapes the wood looking for different thicknesses. The centre of the back is left thicker that the edges (2.5-&-2mm). After this a centre strip is glued along the centre join of the back and three back bars are glued to the back. These back bars are curved and they are going to force the back into a domed shape.
The back is planed and scraped until it has the right thickness.
The back bars are planed to form the curve of the back.
The back is put into the go bar deck and a reinforcement strip of Western Red Cedar is glued to the centre of the back, this strip of wood will have its grain running perpendicularly to the grain of the back.
The centre reinforcement strip is carved using a small finger plane.
After this I sand it smooth and varnish it with a coat of shellac.
Notches are made into the strip so that the back bars can go through.
Back bars are glued to the back using the go bar deck. Under the back there is a concave mould that gives the back its domed shape.
In these photos, I am planning them and shaping the ends of the back-bars.
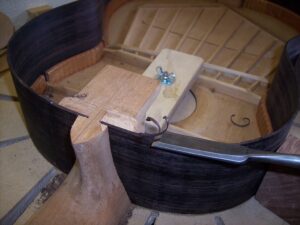
A finger plane is used to plane the surface of the heel block. The inner edge of the heel block must be a little bit higher than the edges of the guitar because the back has a slight dome. The end block is also planed at a very slight angle so that it will follow the dome of the back.
The back is placed onto the sides and centred. I use some assembly clamps to hold the back in place and i mark the back bars and the linings so that I can cut notches into the linings. The back bars are cut to length and so that they fit into the notches.
The back is ready to be glued onto the sides

Finally the back is glued onto the sides with assembly clamps .The heel block and end block areas are clamped with blocks of wood layer of cork underneath.
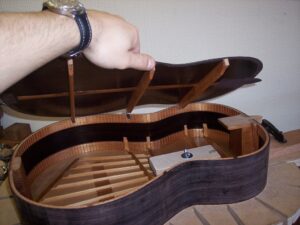
The clamping block is unscrewed and taken out of the guitar through the sound hole.
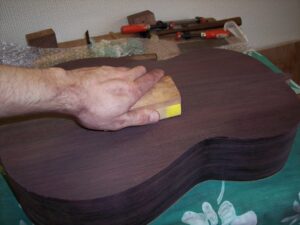
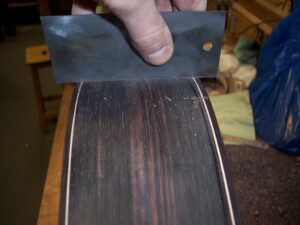
The back and sides are scraped and sanded smooth.
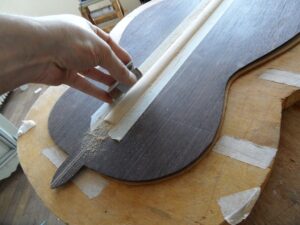
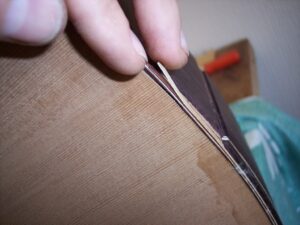
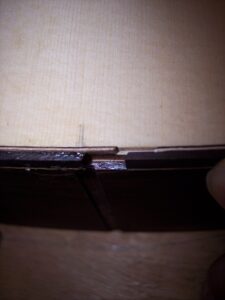
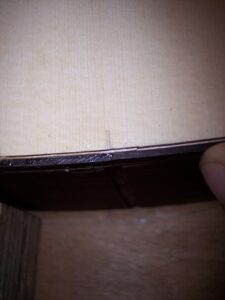
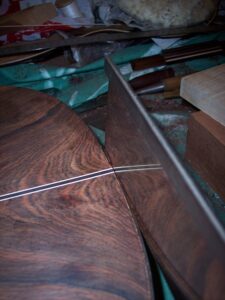
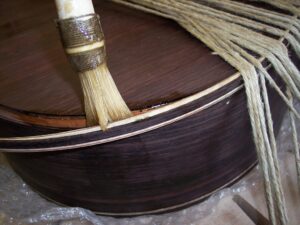
Bindings & Purflings.
Bindings are the strips of wood that surround the edges of the guitar. Between the surface of the soundboard or the back and the bindings there are what are called purflings.
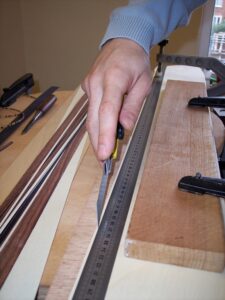
On the left there is a purfling made of a 0.5mm white veneer glued to a 0.5mm black veneer. On the right there are 3 bindings made of a strip of rosewood 2mm x 5mm glued to a white veneer 1mm thick.

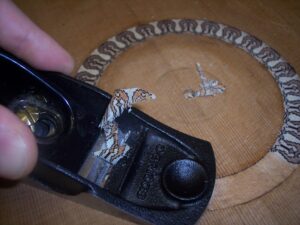
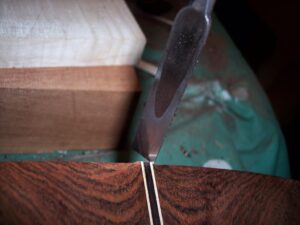
The Soundboard, The back and the sides are marked with a purfling cutter. The purfling cutter is a tool that has a sharp blade inside that can be set at different depths. By running the blade along the wood. The purfling cutter has a guide that is pressed against the surface so that the cut is perfectly strait and parallel.
This guitar has a centre strip that separates the two pieces of the back of the guitar.
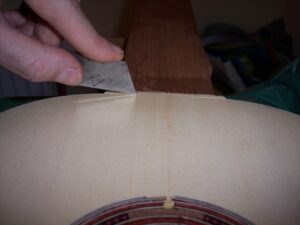
The purfilng cutter is used to mark the soundboard along the edge.
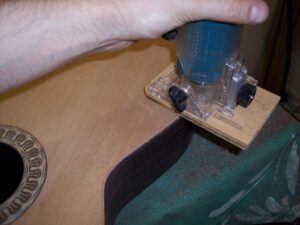
A Router can also be used. The router is a electrical machine that has a wheel that works as a guide along the sides of the guitar.
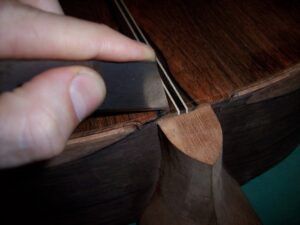
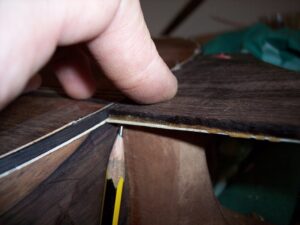
The purfling cutter doesn’t work everywhere. Where the soundboard is joint to the neck the cuts are made by hand with a 2mm wide chisel.
The place where the sides join each other is carved to receive the centre side piece.
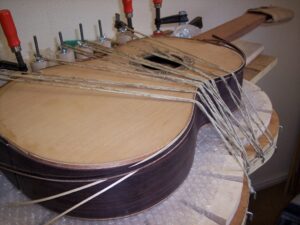
The purfling and the binding is ready to be glued in place.
I use a mould and string to hold the purfling and the binding in place while the glue dries.
The purflings are left longer than the binding so that they can be joined to the other purflings at a different place than the bindings.
The binding is set into place and the measurements are taken to cut them.
The bindings and purflings are joined together. Note how the purflings join a little bit further away than the bindings.
The other side of the soundboard recives the bindings and purflings that are glued in place.
The back of the guitar has a center strip that will be mitred with the bindings.
The Bindings and purflings are glued to the back.
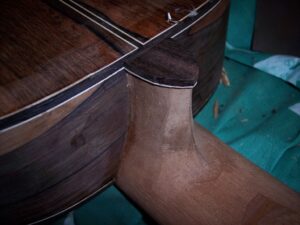
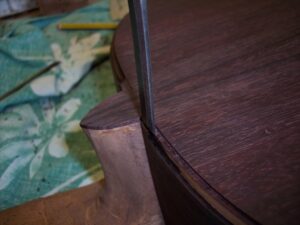
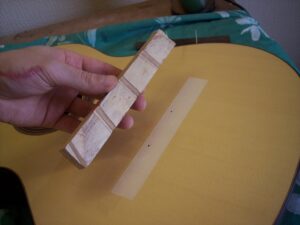
Some guitars have a heel piece glued to the tip of the heel.
The heel with a piece of rosewood glued on the tip and bindings that are mitred with the centre strip of the back.
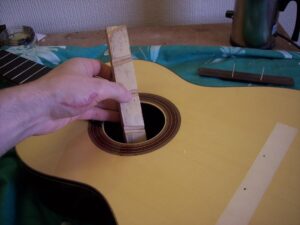
Other guitars have the wood of the back also on the tip of the heel and the bindings and purflings are inlayed into the heel.
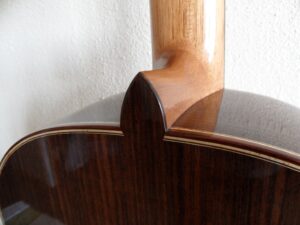
The heel with the bindings inlayed into it.
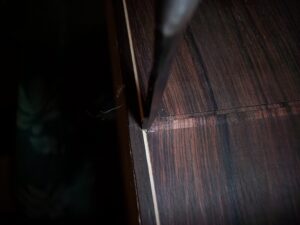
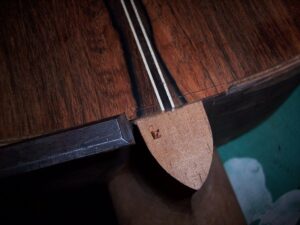
The centre side piece is mitred and inlayed in place.
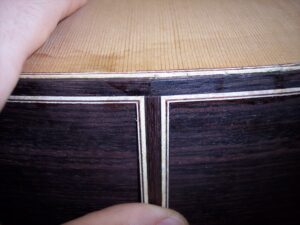
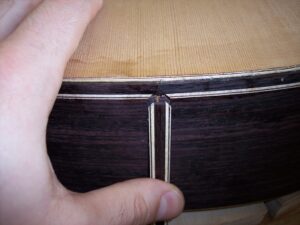
When the mitre fits perfectly on both sides, it is glued in place.
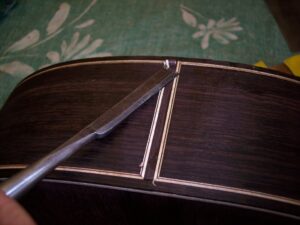
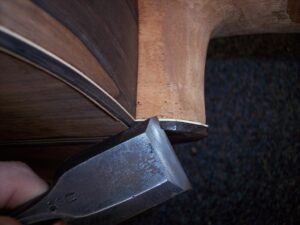
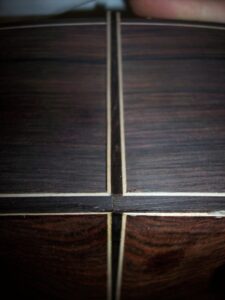
The centre side piece is carved until it is level with the surface of the sides.
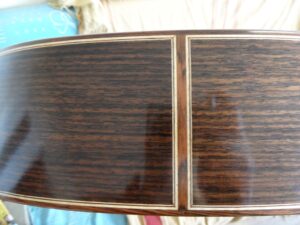
The centre side piece on a fished guitar.
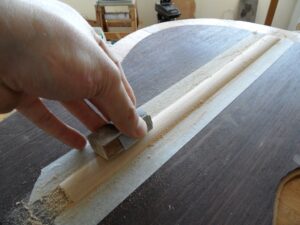
The bindings are scraped level with the sides.
The bindings and purflings are planed and scraped until they are level with the surface of the soundboard and the back.
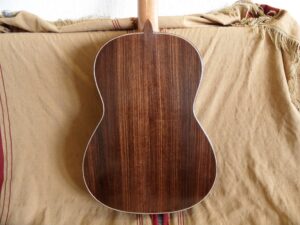
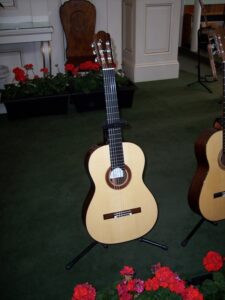
A picture of the back of a finished guitar.
The Fret board
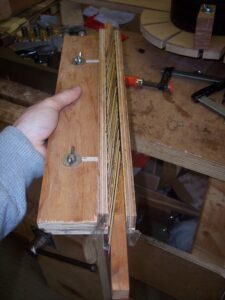
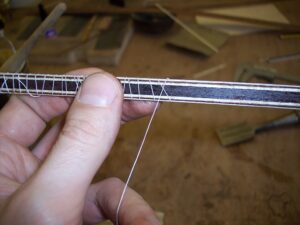
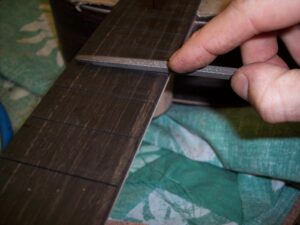
The fret board is made with ebony, a very dark and solid wood. It is planed flat and 19 saw cuts are made to it using a special template and jig. This template ensures that all the cuts are made at the right distance from each other and also parallel to each other.
The Fret board is marked along the edges with a sharp blade and white chalk is rubbed onto the marks to make them visible. I use a Japanese saw to cut the fret board sides. After this the sides of the fret board are planed perfectly straight and a curve with the same diameter as the sound hole is cut into the end of the fret board.
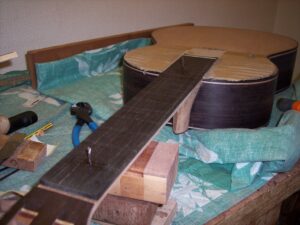
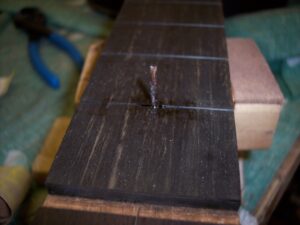
The Fret board is placed on the neck and centred. Two holes are made through the fret board and into the neck at the middle of the first and 12th fret saw cuts. Wooden dowels are placed into these holes that hold the fret board in place.
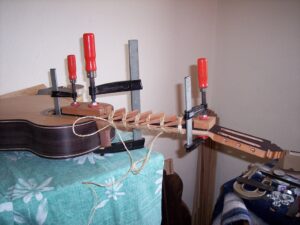
I glue the fret board using wooden cauls, clamps, string and wedges to tighten the string.
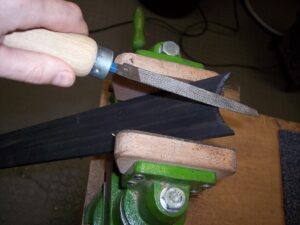
Each saw cut is filed with a triangular file.
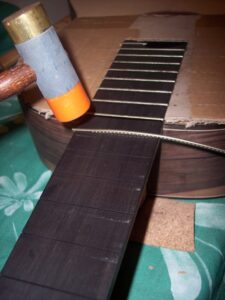

Fret wire is installed into the saw cuts using a hamer. Each fret is filed using a special file.
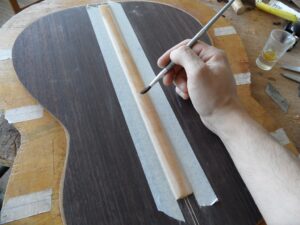
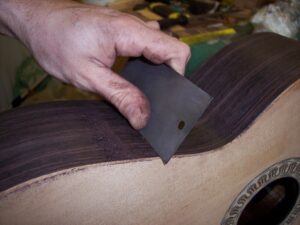
French Polish
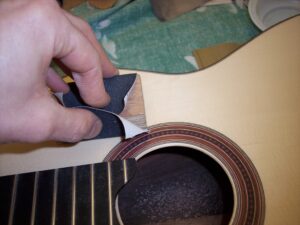
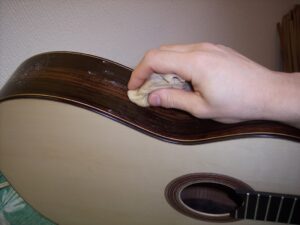
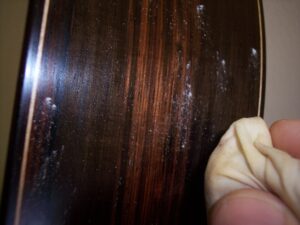

The guitar is sanded with very fine abrasives and polished using shellac. The rosewood surface is filled with pumice powder.
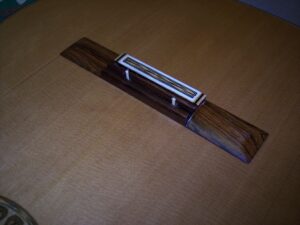
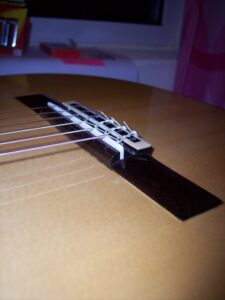
The Bridge
The bridge is made of rosewood. It has a cow bone veneer glued to the tie block. Six holes are made into the tie block using a drill press.
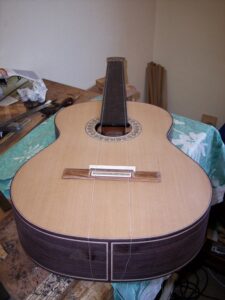
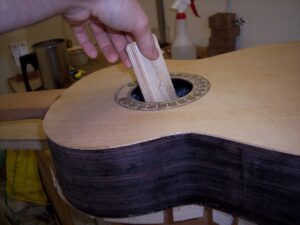
The bridge placed onto the soundboard is centred using two strings on each side.
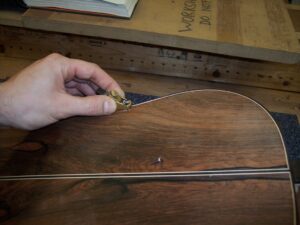
The bridge is placed onto the soundboard and the varnish is marked all around the bridge. The varnish is scraped away using a chisel.Two holes are made into the saddle opening and through the the soundboard. Two wooden dowels will hold the bridge in place on the soundboard.
The bridge caul is placed into the guitar and positioned under the bridge position. I use a piece of wood wedged between the back and the caul to hold it in place The bridge is glued using several cauls and special clamps that are introduced into the sound hole.
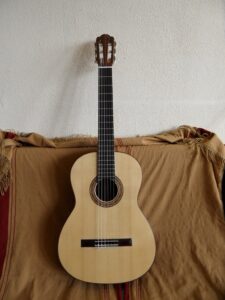
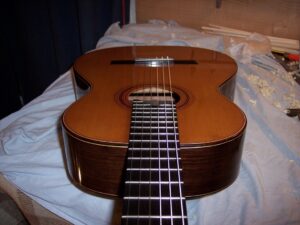
The finished bridge with the saddle and strings.
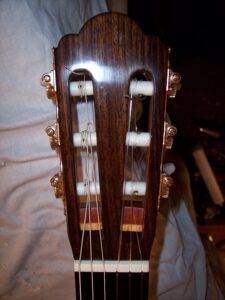
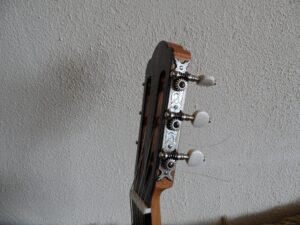
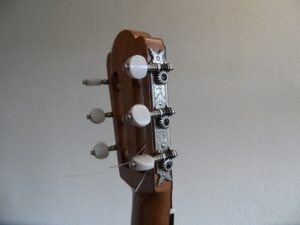
The tuning machines are installed and the guitar is strung.

The strings height is regulated by the nut and the saddle. The typical heights for the strings is 0.7mm between the strings and the top of the first fret. At the 12th fret there should be about 3 mm between the 1st string and the top of the fret, the 6th string should be 4 mm above the 12th fret.